
3D Printing Kois Deprogrammers
Introduction
Those who know me closely will know that I’ve always been into technology. Since graduating from dental school I was flabbergasted by how much digital dentistry was out there that I had not previously been exposed to. Chris at MSG dental introduced me to scanning and 3D printing but it wasn’t until earlier this year that I took the plunge and started printing myself. I found scanning quite easy to adapt to however printing (especially clear resins) was quite a learning curve.

The Printer
I was very kindly gifted the printer from Dr Chris Hanford so thank you! A Creality Halot One.
Learning to Print
My initial efforts at printing were limited to printing study models mainly as I didn't want to run before I could walk and also as I had not gained MHRA registration yet. I had no real issues with printing study models with water washable resin it was on moving to printing dental devices where things started to get tricky. Given a few issues with labs printing deprogrammers, I wanted to give it a go in house. My main reasoning for this was the ability to decide which resin I wanted to use and tailor this should there be any issues.
It took me a couple of weeks to work out the MHRA application however once that was sorted I was ready to go!
Printing Deprogrammers
I did my research regarding resins and once of the resins that was recommended by the Kois Center was DMG LuxaPrint Ortho Plus. I needed to order the 405nm variant as this was the curing wavelength of my printer.
This was were I encountered real challenges. I’m unsure exactly what was causing the issues however my gut feeling is that the clear resins must take more energy to cure. I was initially curing at a 4s exposure per layer and the results were impressive… impressively bad.
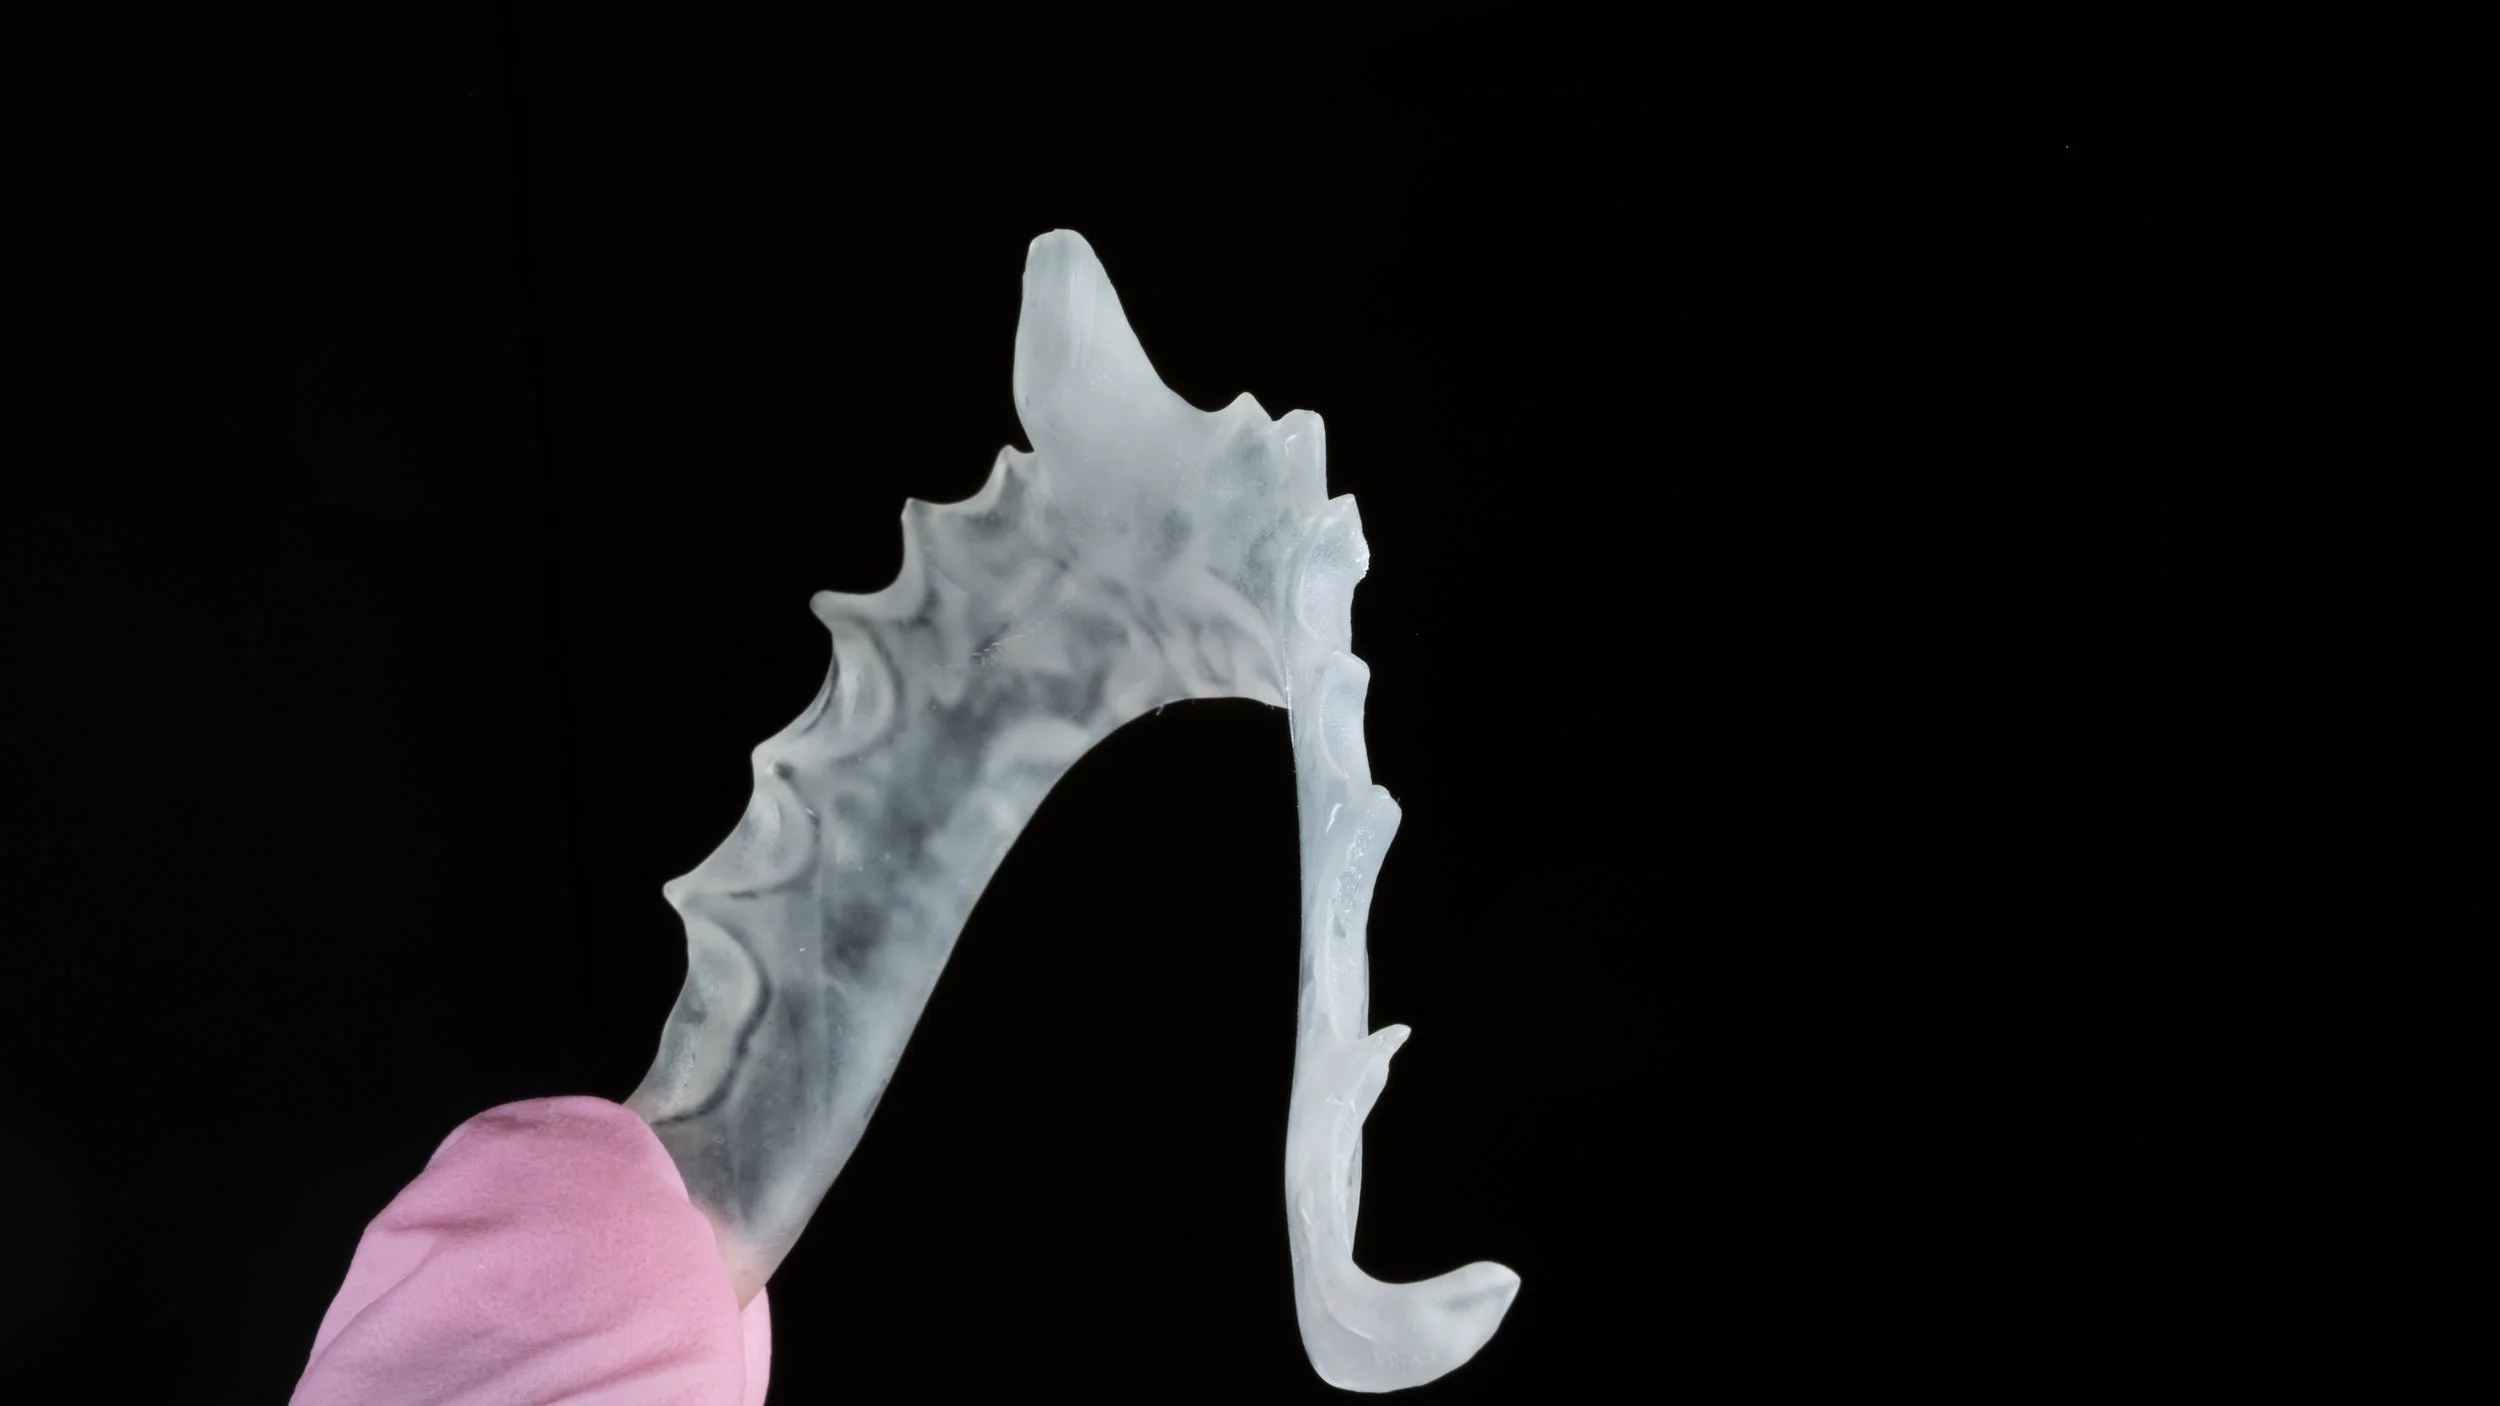
As the initial prints weren't even adhering to the build platform I upper the initial exposure to around 55 seconds this seemed to improve things as seen below, but still no deprogrammers to be seen.
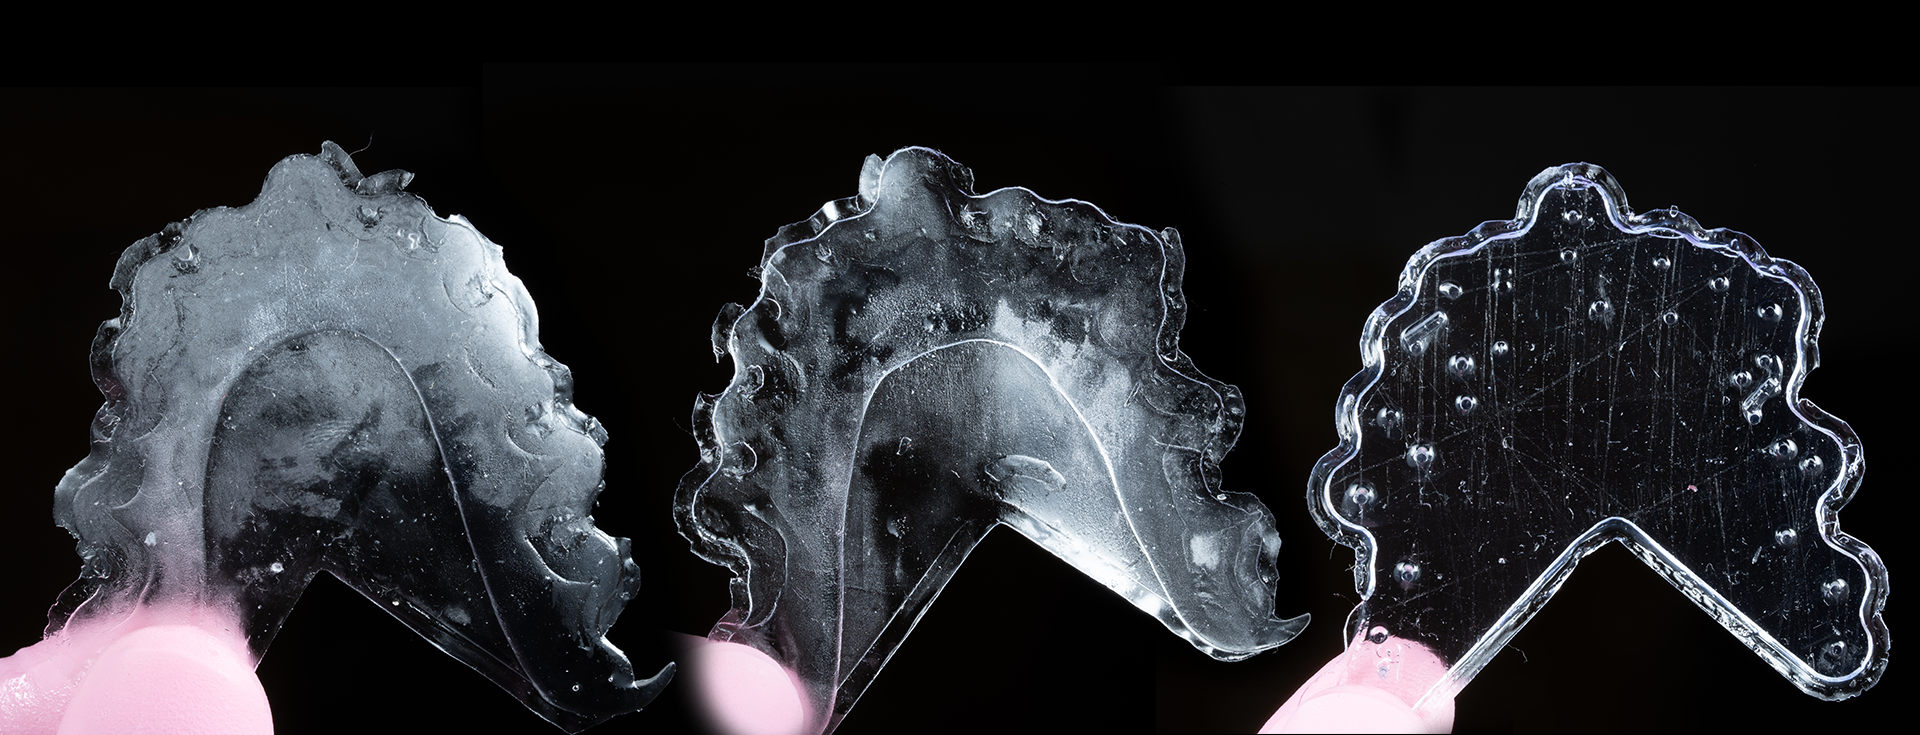
First 3 attempts at printing Kois Deprogrammers
More Research Required
It was following these failed attempts that I realised I needed to do some more research. That being said trying to find information on this topic was really difficult. The main reasons for failure were given as:
Resin temperature - The recommended temperature by DMG was 23 degrees +-2 degrees. Our thermostat was reading 25 in the print room.
Build Orientation on the platform
Calibration
Exposure Settings - This was going to take some time
My Main Point
The main thing I learned in this initial process was how important printing verification jigs are. Rather than setting off a full deprogrammer to print taking 2+ hours on this printer. The jigs take approx 10-15mins to print and have various details within them allowing you to assess the quality of the print at those print settings. This allows you to quickly dial in print settings when using a new resin without having so many failed prints (having waited 2-3 hours). In addition, it is less wasteful as less resin is wasted should you get a failed print. I suspect this is not required if you are using more expensive printers with validated resins however for 3rd party resin use this will be my go to workflow from now on.
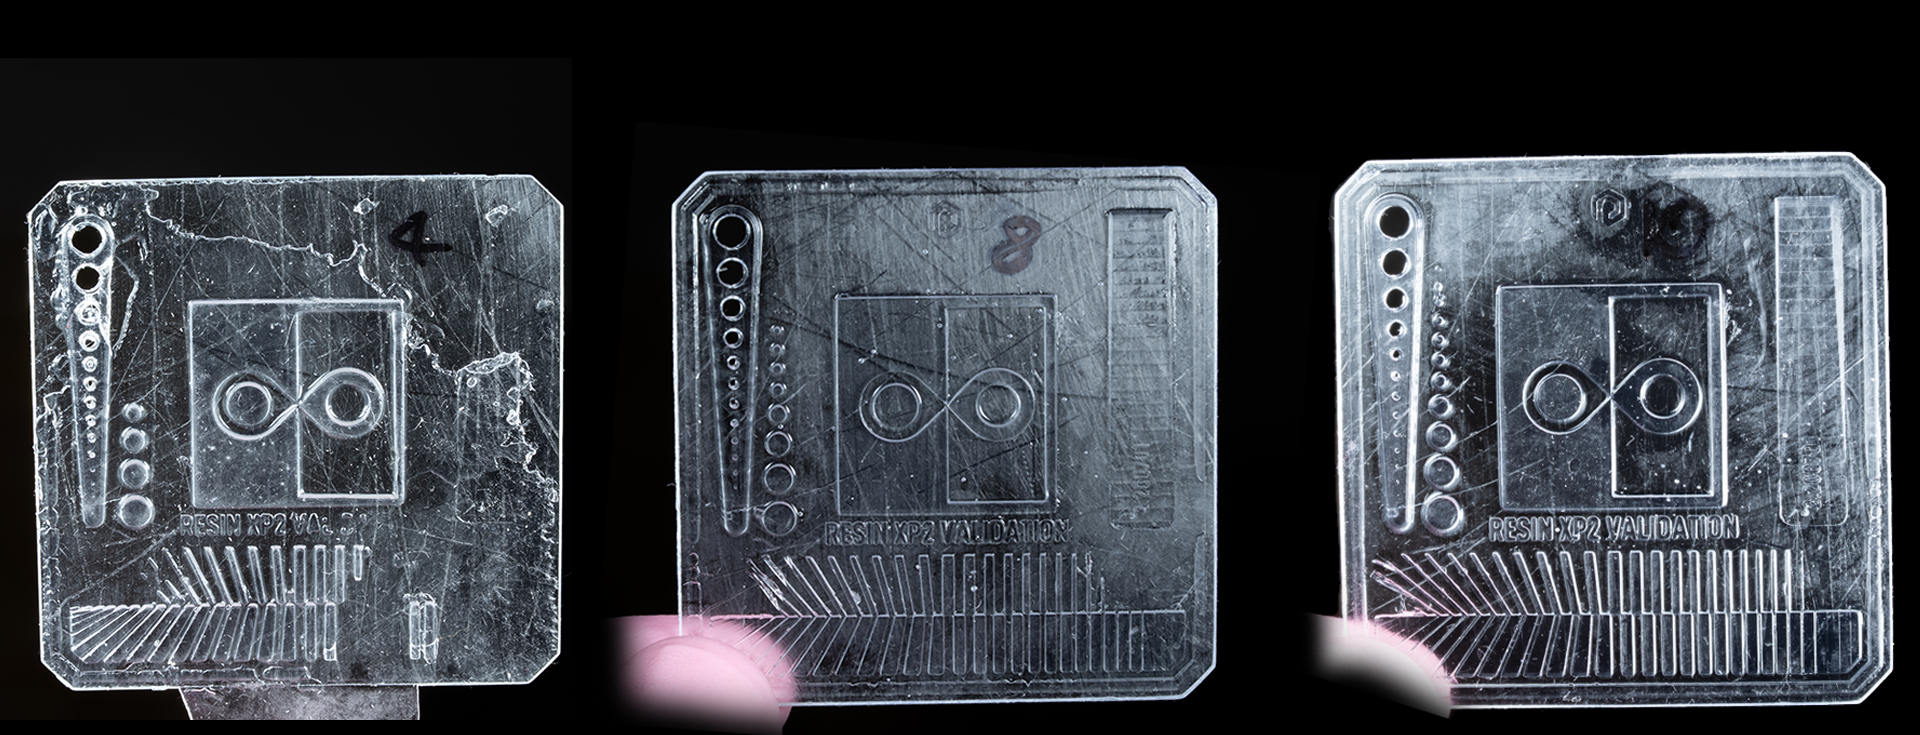
Verification Jigs - you can see how the accuracy of the print increased as the exposure time increased per layer.
Success
Once I had the settings correct (and written down!) I had another attempt at a deprogrammer with the improved settings. I also tried some thicker supports to see if this also helped and finally a successful print. After some finishing and polishing the deprogrammer was good to go. It also slotted straight in which is always a positive. Also excuse the lack of lip retraction, it was a lunchtime fit job!


